マツダ ボンゴフレンディ 下回りの錆び/腐食穴修理とアンダーコート施工!
2014年10月3日
本日の入庫車輌はこちらです (^o^)/
すでに車上がり気味ですが ボンゴフレンディーです。
今まで長年にわたり大切に乗られている愛車 (≧∇≦)
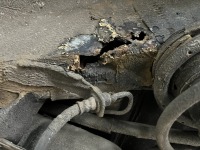
特に下回りのサビが気になるとのことでの入庫です ^_^

サイドステップの表側

サイドステップの裏側

フロアーの下側フレーム
確かに酷くやられています ∑(゚Д゚)
腐食で空いた穴たちを鉄板を当てて塞いで下回り全部に

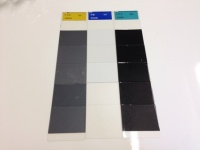
このアンダーコートを吹き付けます!!
本日は持ち込み入庫 ありがとうございました !
少しでも長持ちする様に直しておきます m(._.)m
追記!
鉄板が無くなっていた部分の施工法(当て板による修理)のご紹介 (^o^)/