チェイサー JZX100 バッテリーケース 取り付け!
2022年12月17日
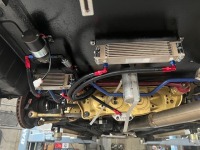
製作中のO様チェイサーですが、バッテリーをトランクルームに移設しました。
アルミ製バッテリーケースを使用して加工取り付けになります。

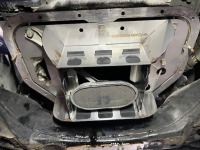
トランクルームにはサーキットに行く際に荷物を積めるように、バッテリーケースとコレクタータンクはなるべく左右の端に寄せてマウントしました。


バッテリケースは土台をアルミアングルで製作して左端にマウントしました。


コレクタータンクは部品取りになった車輛から移設しました。

コレクタータンクはベースマウントを製作して右端にマウントしました。

レーシングハーネスを使用して各ポンプにリレーを取り付けます。
端子側には端子カバーを使用して安全対策をしています。

特にコレクタータンクはガソリンが回っていますので、ホース類も気を付けて組付しています。
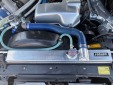
お客様から『エンジンルーム側でバッテリージャンプ出来るようにしてほしい』とのご要望がありました。。。

バッテリージャンパーポストを使用して製作しました。

手動リセットサーキットブレーカーも取り付けしました。サーキットブレーカーは、バッテリーのオンオフボタンスイッチとしても使用出来ますので、普段乗らない時はバッテリー上がり防止にもなりますね。